

Here are two versions of Pickled Asparagus using the same brine so you can make Dill and Garlic or Sweet and Hot. Or some of each. This is an easy pickling recipe and they’re ready to eat in as little as a few weeks, but they store for ages.
If you’re new to making pickles, this recipe is a great starting point. You don’t need any special equipment and the method is simple. Since asparagus has such a short season, it’s a great way to enjoy them year round. You’ll find below some excellent tips and info that will be helpful to novice pickle makers, or, click the link below to jump right in!
Jump to Recipe
How to choose asparagus for pickling
Most farms sort their asparagus into different grades. You can choose the best ones or save some money by using the seconds. The top quality are nice and straight with tightly closed heads and not too thick or thin. Straight stalks are easier to pack in jars and they look nice if you’re giving Pickled Asparagus as gifts.
Seconds have heads that are a bit seedy or partially broken off and they aren’t usually as straight as firsts. They can also vary widely in thickness. No matter what grade you choose, they all taste the same. Just avoid the very thick or thin spears. I like to use some of each grade so I have better looking jars for gifting and some that aren’t as perfect for myself.
What equipment do I need to make Pickled Asparagus

It’s not necessary to go out and buy special pickling equipment. If you do have a large canner pot with a rack that fits inside, along with canning tongs and a magnetic lid holder, you’re all set! Or maybe you know someone who has all that stuff and you can borrow theirs, or make pickles together. But, any large pot that can hold enough water to completely cover the jars will do. As long as your jars are spaced apart without touching, you can process them in that pot with a dishcloth in the bottom to add a protective layer between the bottom of the jars and the base of the pot.
Canning jars are sold in boxes with new rings and seals and sometimes even fancy labels. You can reuse the jars over and over but new seals should be used every time. You can buy boxes with rings and seals or just seals. You can reuse the rings if they aren’t rusty.
It’s important to label your jars. You might think you’ll remember what kind of pickles you made months later but, if you make different kinds it’s a good idea to label them. And include the month and year because you may not get through them all in one year and yes, if properly sealed, the jars will last for ages. Labels can be purchased along with canning supplies and they come in regular or dissolving. Since I’m a thrifty girl, I buy sheets of labels from a business supply store for a lot less money. Not as fancy but they work just as well.
How to process jars of pickles
Processing jars of pickles, or Water Bath Canning is important if your jars will be stored in the pantry. Heating the contents under pressure will kill bacteria. The vinegar also acts as a safety net to ensure there’s no bacteria left behind. As the jars cool, they form a tight seal. You’ll hear the lids pop and the seal will be inverted.

You need to wait at the very least about 2 or 3 weeks before opening a jar of Pickled Asparagus. This gives them enough time to fully develop their flavour. Some types of pickles, like Dill Pickles, need about 6 weeks before opening.
If you prefer to skip the water bath processing, just put the jars in the fridge. They’ll keep for a ages. My friend Lisa who runs the local asparagus farm says the woman who passed down her Pickled Asparagus recipe to her recommends waiting a year before opening them. We can’t wait that long.
Step by step instructions for making Pickled Asparagus
- Rinse asparagus well. Snap off ends and discard. Asparagus spears will naturally break off at the point where the stalk gets woody.
- Fill canner or large pot with enough water to fully immerse jars. Bring water to a simmer.
- Wash jars in hot soapy water and rinse well with very hot water, then drain. Or run jars through a wash cycle in the dishwasher.
- Add garlic, dill, and/or hot pepper (depending on what type of pickle you are making) to the bottom of each jar.
- Cut one asparagus spear to fit in jar standing up about a half inch from the top.
- Using the one measured spear as a guide, line up bundles of asparagus at tip end and cut to same length.
- Pack spears tightly into jars. Use either all tips or insert longer cut ends into jar as well.
- Top with more dill (if making that type)
- Prepare brine and bring to a boil. Carefully pour hot brine into each jar, leaving 1/4 inch space at the top.
- Wipe jar edges with clean damp cloth and ensure nothing is touching edge
- Quickly dip seals into hot canning water with magnetic lid holder or tongs to soften rubber. Place on top of jars. Top with rings and hand tighten. Do not over tighten.
- When canner pot has reached a full boil, lower jars into pot and cover with lid. Process for 12 minutes for pint jars (500 ml or 2 cups). Reduce or increase time if using smaller or larger jars.
- Remove from pot and cool on heat safe surface.
- Store in cool, dry and dark space

Frequently asked questions
- Eek my garlic turned blue! It’s nothing to worry about, just a chemical reaction with the minerals in the water, salt or acid. Totally normal!
- Why is the pickle brine pinkish? Some varieties of asparagus contain the same pigment that gives beets their colour. Certain growing conditions like cold nights can increase the amount of pigment.
- What are those little gray spots on my pickles? Don’t panic. It’s a bioflavonoid called Rutin, which is drawn out of the asparagus when heated with vinegar. It crystallizes on the surface of the spears and is not harmful at all.
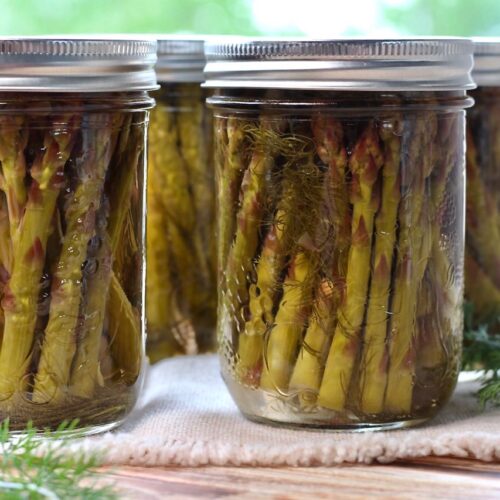
- Are my pickles supposed to be floating? When the hot brine is added to the jars, the asparagus shrinks slightly and floats to the top. They will settle back down into the jar, usually within a few hours.
- What do I do with all the leftover chunks? You can sneak longer ends into the jars or even make one jar just with chunks. Or, use in other recipes such as Asparagus Pesto Penne, Shrimp and Asparagus Risotto or Roasted Garlic and Asparagus Soup.
- Am I supposed to remove the rings from the jars when they’ve cooled? You can, the jars will stay sealed. But when you open the new jar, you won’t have a lid to put back on. It’s only a problem if you don’t eat the entire jar at once. Which can happen. It’s only 50 calories so who cares?

So now you’re ready to make Pickled Asparagus. They’re an excellent addition to a charcuterie board. Add them to a Bloody Mary or Caesar. Or yes, just eat them right out of the jar. If you make some, feel free to comment or leave a rating below. Here’s the recipe:
Pickled Asparagus
Equipment
- Canner
Ingredients
Dill and Garlic Pickled Asparagus
- 6 lb fresh asparagus allows for trimming
- 7 cups water
- 3 cups pickling vinegar 7% acidity if using 5% vinegar, increase to 3½ cups
- 3 Tbsp pickling salt or course sea salt do not use table salt
- 14 fresh dill fronds
- 7 medium sized garlic cloves cut in half if very large
Sweet and Hot Pickled Asparagus
- 6 lb fresh asparagus allows for trimming
- 7 cups water
- 3 cups pickling vinegar 7% acidity if using 5% vinegar, increase to 3½ cups
- 3 Tbsp pickling salt or course sea salt do not use table salt
- 1 ⅓ cups white sugar
- 2 Tbsp pickling spice
- 7 hot peppers dried or fresh
- 7 medium sized garlic cloves cut in half if very large
Instructions
- Wash 7 pint jars in hot soapy water or in dishwasher.
- Rinse asparagus and snap off woody ends. Cut spears to fit in jars and fill tightly. Lay spears upright and fit leftover pieces without tips in the centre for best appearance.
- Prepare brine by combining water, pickling vinegar and salt in pot. Heat to boiling.
- Bring a very large pot or canner to a boil. Fill with enough water to cover jars when inserted.
For Dill and Garlic Pickled Asparagus
- Put a frond of dill and a clove of garlic in the bottom of each jar. Fill tightly with asparagus and top with more dill.
- Pour hot brine into each jar, leaving about ¼ inch space at the top.
For Sweet and Hot Asparagus
- Add sugar and pickling spice to brine mixture. Return to boil until sugar dissolves.
- Add a clove of garlic and a hot pepper to each jar. Fill with asparagus, arranging as above in upright position for best appearance.
- Pour hot brine into jars leaving ¼ inch of space. Try to get similar amounts of pickling spice in each jar.
For All Jars
- While waiting for canner pot to come to a boil, wipe each jar rim to ensure nothing is on it to interfere with tight seal.
- Dip new seals into hot water for about 10 seconds. Carefully place on top of jars. Add rings and tighten, being careful not to over tighten.
- Using rack or by placing a kitchen towel in the bottom of the pot, carefully lower jars into boiling water, ensuring entire jar is covered. Cover pot and boil for 12 minutes. You may need to do this in batches depending on the size of your pot.
- Remove jars carefully and cool on counter. Seals will "pop" as they invert during the cooling process. Any jars that don't seal properly can be stored in the refrigerator.
- Pickles can be opened in a few weeks but are best left at least a month and last for ages in the pantry.
Notes
Nutrition
This recipe is included in a free downloadable collection of asparagus recipes by Yummy Farm in partnership with Ontario Asparagus. Click here to see the collection.
One thought on “Pickled Asparagus”