
Making your own pastry is easier than you think. This recipe features both lard and butter to maximize the advantages each has to offer. With a few tips and tricks passed down for generations, you’ll be making Perfect Pie Pastry like a pro.
My grandmother used to say if company stopped in she could have a pie in the oven before the coffee was ready. That’s the level of pastry making expertise I’ve grown up with. But even the most experienced pie makers have flops so don’t be afraid to try making homemade pastry. It’s more forgiving than you think.
Jump to Recipe
This King Arthur Flour link is an excellent resource with lots of information about different types of flour and fat and how it affects the final product. Each of the 3 types of fat – butter, lard or shortening – have their advantages. I’ve made pastry with all of them on their own and in combination. This recipe is my favourite for making both sweet and savoury pastry dishes.
And use cold fat right from the fridge. You only need a little water but it has to be very cold so drop in an ice cube to make sure it’s cold enough before adding it to the dough. Too much water equals shrinkage. And finally, wrap the pastry tightly in plastic wrap and refrigerate for at least 30 minutes before rolling it out. This lets the glutens relax to prevent tough pastry.
How to make Perfect Pie Pastry
Here’s the secret to making Perfect Pie Pastry. The less you touch it the better. You want to keep it cool to prevent the fat from melting before it hits the oven so hands off. How do you make a pastry without touching it? The food processor of course! Even the pros do this. So let’s make some pastry!
Measure your cold butter and lard or shortening. The boxes have lines to show different measurements when cutting in flat slices. This is very helpful. But did you know you can also measure solid fat by immersing a chunk into very cold water? It’s basically displacement so for instance, if you want 1/3 cup of butter, fill a glass measuring cup to 1 cup of very cold water, then add the butter and push it down until it’s under the water. Use a fork or something that will hold the butter but not add too much volume to mess up the measurement. Then look to see where the water line goes up to. If you have 1/3 cup of butter, the line will go up to 1 and 1/3 cup. Easy right? This also works with other fat based products like peanut butter!
Quickly cut the butter and lard into chunks and remember, as little handling as possible. Drop it into the food processor and add the flour and salt. Pulse in short bursts. Watch for the flour to become coarse while still seeing small fat chunks, ideally the size of peas or a little larger. Then slowly add water a spoonful at a time and pulse after each time. Once the pastry is starting to stick together (while there’s still some not blended), dump it out onto plastic wrap, seal and refrigerate. This allows the dough to rest which helps prevent tough pastry.
Once the dough is chilled, flour a large clean surface, unwrap the dough and roll it out with a floured rolling pin. You should be able to see the small lumps of fat. If it’s been in the fridge for a while you may have to wait for the pastry to warm up enough to roll out.
Pastry freezes well. Wrap it up tightly in plastic wrap then drop into a freezer bag and store for up to 3 months. When you’re ready to make pastry, defrost in the fridge over night or on the counter for a few hours until it’s soft enough to roll. It should still feel cool but soft enough that you don’t have to press to hard with the rolling pin.

Make sure you flip the dough a few times and turn it a quarter turn after rolling up and down from the middle. Keep it well floured to prevent it from sticking. Try to keep it from having thick and thin spots, especially at the edges where it can get too thin. Don’t expect it to be perfectly shaped.

When it’s slightly larger than the width of the pie plate, use the rolling pin to fold the dough over and transfer to the pie plate. Adjust it so that the dough hangs over evenly and is sunk into the pie plate.


If you have to patch a spot, cut a piece off where you have extra overhang, brush water on the edge and press together. It might hold together. Or not. But don’t worry about that too much. If you’re doing a single crust, use a sharp knife to trim the edge. Crimp, fork, pinch, whatever method you like to give the edge a nice finish. This is our family method – use 2 fingers to make a “v” then with your other hand, use your thumb to press the pastry in.

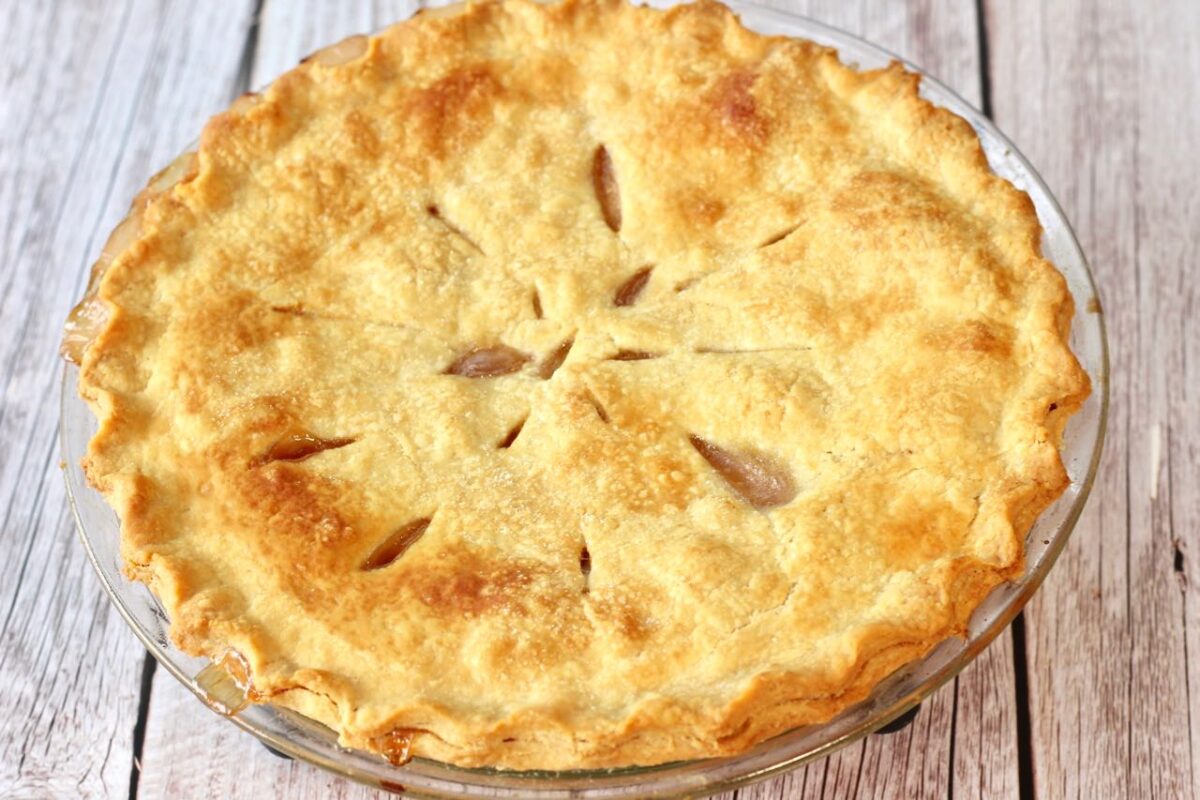
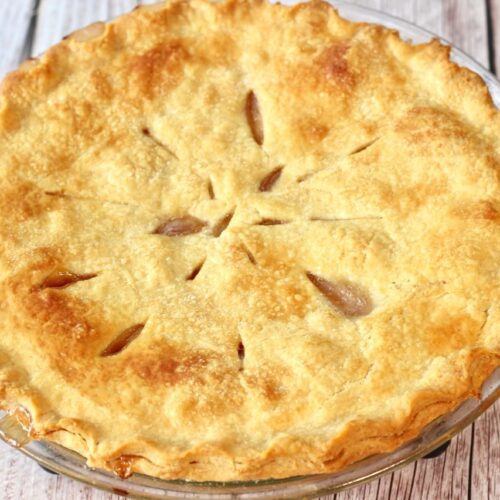
Otherwise, if you’re doing a top crust, wait until both pieces are in place to trim. Before adding a top crust, brush the edge with cold water or egg whites and gently press to stick together. Then trim and finish the edge. Filled pies need to be vented. Use your imagination to create a pattern.

Once you’ve practiced making Pastry, why not make some Butter Tarts. This is the pastry used for Rhubarb Custard Pie.
If you try making your own Perfect Pie Pastry, consider leaving a comment or rating below. Here’s the recipe:
Perfect Pie Pastry
Ingredients
- 2 cups all purpose flour
- ½ tsp salt
- ⅓ cup cold lard or shortening
- ⅓ cup cold unsalted butter
- ¼-⅓ cup cold ice water plus extra for brushing edges if making double crust pie
Instructions
- Add flour and salt to food processor.
- Measure butter and lard or shortening and cut into chunks, handling as little as possible. Add to food processor.
- Pulse in short bursts until fat is incorporating into flour, pieces the size of a pea or a little larger.
- Add cold water in spoonfuls and pulse quickly between each addition. When some of the dough is starting to form a mass but not completely, pour onto a large piece of plastic wrap.
- Press dough quickly into a disk and cover tightly. Refrigerate at least 30 minutes. Can be left up to one day in fridge or frozen for 2-3 months.
- When ready to roll out, allow to rest a few minutes to warm slightly. If making a double crust pie, cut dough in half, roll out first half and keep other half wrapped until ready to roll. If making tarts, it's also a good idea to roll out half first to keep dough from drying out while forming tarts.Roll dough on a floured surface. Be sure to turn and flip dough while rolling out to ensure even thickness and prevent sticking. Flour both sides generously and also the rolling pin.
- If making a pie, roll one half to a circle at least a few inches larger than the pie plate. Gently roll the dough over the rolling pin and carefully lower it into the pie plate. Allow to sink into the pie plate and adjust as necessary to fit.
- If making a pre baked single crust, crimp edges and bake on lower rack at 400° for 10 minutes, then reduce temperature to 350° for about 30 minutes. To prevent crust from puffing up you can add dried beans or rice over foil, parchment or even a coffee filter while baking.
- For filled baked pies, roll out second half of dough and place over filled pastry. Brush water or egg whites over edge of bottom crust and press gently to seal. Crimp edges. Follow recipe direction to baking temperature and timing.
- If pastry edges are browning too quickly you can cover the edges with silicone edge covers. You can make your own by cutting out the centre of a tin pie plate or even scrunching foil into strips to fit.